Friday, December 28, 2007
SAGE DRESSING
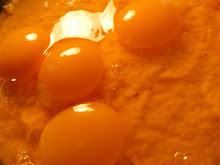
Some of these photos are blurry. At the time of shooting, I had been into the "Christmas Cheer" and while looking through the lens of the camera, I wasn't sure whether it was the camera or myself that was out of focus. It appears that it was the camera! So...I have included the blurry shots not only to illustrate the process of making this dressing, but also to illustrate the dangers of celebrating too much while on the job.
This stuffing was for myself, so I wasn't actually "on the job" at all. This was the accompaniment to the chicken dinner I made for Christmas. It is a dressing made outside of the bird. I am in the habit of making dressings this way because it isn't completely safe to dress a bird, and cooking in restaurants serving customers requires the safest practices possible in order to minimize the risk of food poisoning. It isn't a pleasant subject, but it is a reality.
This is a basic sage dressing made from cubed bread, herbs, aromatics, stock, butter and seasonings. It is made in a pan and baked in foil until done. It is very simple and could be baked in a pot. However, I like to bake it this way because it looks nice when sliced presented on the plate.
Sage Dressing
1. Allow 2 loaves of sliced white bread to dry for a few hours by unwrapping it and leaving it out in open air. After about 4 - 6 hours, cube the bread into 1/2 inch cubes into a large pan.
2. Prepare the aromatics for the dressing by finely chopping celery, onion and shallots and sweating them in butter. How much you say? Well...I like to have 1/2 the volume of the bread cubes in aromatics. I like to use 1/2 of that volume in onions/shallots and the remaining 1/2 of that volume in celery. Sweat it all off in about 1 pound of butter until translucent.
3. Spread the cooked aromatics over the cubed bread. Drizzle the melted butter over the bread evenly and stir everything together until evenly mixed.
4. Drizzle cold stock over the bread while stirring. Once the bread clumps together easily that is enough stock. The bread should not be wet or soggy...just moist.
5. Season this mixture with salt and pepper. Add chopped sage, parsley and rosemary. Mix one more time thoroughly.
6. Distribute this mixture down the center of 2 large lengths of foil wrap as in the photo. Roll and wrap into 2 sausage-shaped rolls and twist the ends to seal.
7. Bake at 350 for an hour to an hour and fifteen minutes. Serve while hot.
Thursday, December 27, 2007
SAUCE PRODUCTION 101: CHICKEN DEMI GLACE
I first learned to make demi glace in cooking school. It was an intricate process of taking a brown stock (a stock made from roasted veal bones, roasted mire poix, wine, brown roux and herbs) and simmering it into a thickened sauce. This sauce served as a "mother sauce" for the creation of countless other sauces.
When I got out into the industry, working is some of Toronto's top kitchens, I saw a different process being used to make demi glace. Basically the process was the same, but the roux was dropped out of the process altogether. The brown stock was fortified with the above listed ingredients and allowed to reduce to a thickened sauce via reduction. This yielded a cleaner, more intense tasting sauce. The actual yield was a fraction of what was yielded by the artificially thickened sauce, and that of course drive the cost up, but less was needed to flavor a sauce because of the concentrated flavor.
Stocks
There are two types of stocks; blond stocks and brown stocks. A blond stock is made from raw (unroasted) bones , raw mirepoix, herbs and spices. A brown stock is made from roasted bones, roasted mirepoix herbs and spices. The roasting of the bones and mirepoix caramelizes the sugars found in these components of the stock giving flavor and color to the stock.
Mirepoix
Mirepoix is the French name for a combination of onions, carrots, celery (either common celery or celeriac). Mirepoix, either raw, roasted or sauteed with butter, is the flavor base for a wide number of dishes, such as stocks, soups, stews and sauces. Mirepoix is known as the "Holy Trinity of French cooking.
Traditionally, the ratio for mirepoix is 2:1:1 of onions, celery, and carrots. The ratio for bones to mirepoix for stock is 10:1. When making a white stock, or fond blanc, parsnips are used instead of carrots to maintain the pale color.
Stock Basics
I have chosen , here, to make a brown chicken stock. I have browned my raw chicken bones in the oven for about 1 1/2 hours at 425 degrees. This gives the bones a nice even golden brown color. Afterwards, I roasted the mirepoix in the oven until evenly browned also. Normally I would roast the bones and mirepoix together, but I had too many bones and there was not enough room for the mirepoix, so I roasted in two stages. If there is too many bones and too much mirepoix in a roasting pan, nothing will brown properly and that will effect the color and flavor of the stock.
Once everything is roasted, I transferred the bones and mirepoix to a large stock pot and added cold water. I filled the pot op just past the top of the bones. I then added some parsley stems, dried rosemary, dried thyme leaves, bay leaves, whole black peppercorns and a few cloves of raw garlic. Once everything was in place...I turned on the burner and let the process begin.
Once the stock reached the boiling point, I reduced the temperature and allowed the stock to slowly simmer over night. In the morning, I strained off the stock and threw away the spent bones and mirepoix.
From Stock To Demi
The was transferred to a smaller pot for reduction. I added to this basic brown chicken stock red wine and more roasted mirepoix. The stock was allowed to reach the boil and then was reduces to s slow simmer for reduction. When the stock had reduced by half of its volume, I strained it into a smaller pot and allowed it to reduce by half again. This was the finished product.
As you can see by the samples in the two glasses, the original brown stock is much lighter and transparent than the demi glace. The flavour is a fraction as intense also.
This demi is just a mother sauce for many other sauces and is usually used as a flavoring agent much like an "OXO" cube. However, this demi can be used "as is" as a sauce and it is super amazing!!
TO BRINE OR NOT TO BRINE...THAT WAS THE QUESTION
Sometimes we're faced with the fact that we don't know as much as we think we know. Or better put, we don't know everything within our field of expertise. Recently, I was faced with such a discovery about myself, and that discovery came to me in the form of the simple procedure known as brining. I had never done it!
When faced with the reality of cooking Christmas dinner for two this year, I decided to roast a nice chicken rather than a turkey. Actually, the truth be known, I'm kind of tired of turkey. I like tradition as much as anyone, but I have been roasting turkey twice a year for a long time and I have decided that I will mix it up a bit from now on. But this year I was cooking for two, and I just didn't want to be bothered dealing with leftovers well into the new year.
Anyway, I decided to roast chicken this year, so I went to see Tony, my local butcher. He had some beautiful little five pounders that caught my eye, so I got two (yes two!) as well as 10 pounds of bones for my stock. This was going to be a chicken dinner worth remembering!
The reason I got two chickens was because I had a request to brine the chicken before I roasted it. I had never brined anything in my life, and as far as I was concerned, brining was a procedure meant to infuse moisture into a piece of meat - or in this case, a fowl - where moisture would be lost during the roasting process. I always thought that my roasts and fowls were nice and moist and I didn't need to resort to brining to turn out a nice finished product.
I agreed to brine the chicken but I thought I would get a second and roast it as usual to compare the two. There was a huge difference!
This particular brine incorporated tea, oranges, salt, brown sugar and bay leaves. The mixture was heated, then cooled, and the chicken was submersed in it for a day. After brining, the chicken had a golden color to it from the tea; the skin and flesh both had a deep golden/orange hue. The chicken was also a little plumper than it had been prior to the brining due to the fact that some of the brine had been absorbed into the flesh of the chicken.
I seasoned and filled the cavity of both chickens with herbs , oranges and lemon and roasted them side by side. The chicken that had been brined was a dark brown color after roasting, whereas the unbrined chicken was the usual golden brown. This was an interesting contrast.
Once the chickens were carved into, I can't say as I found a noticeable difference in the moisture content between the two birds. Both were juicy. I tasted the two and found that the brined chicken had a really amazing flavor not present in the other chicken. I could taste the tea and orange in the flesh and it was incredibly tasty! I was actually very impressed with this!!
Having done this experiment and seeing for myself the results of brining, I can see the possibility for so many flavor combinations. Not only are the flavor combinations extensive, but small cuts of meat can be brined as well as the larger ones. Why not brine chicken parts, chops and steaks? After all...brines can be little more than wet marinades.
Orange Herbal Chicken Brine
5 cups hot water
6 orange-flavored herbal tea bags
1 cup kosher salt
2/3 cups brown sugar
4 bay leaves
2 tsp dried rosemary
1 6-7 lb roasting chicken
In an 8 quart non aluminum pot, combine the first six ingredients and stir until salt and sugar are thoroughly dissolved. Add 9 cups of cold water. Place chicken in brine, neck side down, and cover. Refrigerate for 8 hours, or over night.
Roast chicken at 325 degrees for 15 minutes per pound.
Wednesday, December 26, 2007
SEARED SCALLOPS WITH SAGE AND PANCETTA
Scallops are definitely my favorite treat from the sea. Not only are they my favorite treat from the sea...but I don't think anything can equal my overall enjoyment of scallops if they are prepared properly. Scallops really don't need much help to take the spotlight at any dinner...but for the adventurous, the flavor combinations are limited only by the imagination, and preparing them can be as complex as the heart desires.
As mentioned, scallops can be prepared simply and still blow your mind with their sweet, tender, satisfying flavor. Really, all they need is to be pan-fried in butter and seasoned with a little salt, pepper and fresh lemon and they're pretty much perfect. The most important rule in cooking scallops - as with most seafood - is not to overcook them. They lose tenderness if cooked past medium. Actually, the term "flash in the pan" is best remembered when cooking scallops; they are best if cooked briefly in a very hot pan or on a very hot grill.
Here, I have seared the scallops in a thin pan at a high heat and finished them quickly in a hot oven. I chose to wrap the scallops in sage and pancetta and serve them with a sundried tomato beurre blanc. The saltiness of the pancetta and the acidic tang of the beurre blanc contrast the sweetness of the scallops and accentuate that characteristic nicely.
Scallops Wrapped in Sage and Pancetta
1. For this recipe, I chose the largest fresh scallops I could get. There should be not fishy smell at all with scallops that are fresh. They should smell sweet and appear snow white and very moist. Use between 4 and 6 scallops per person. Select the freshes sage you can find also. I like to use long leaves for this recipe because it makes wrapping the scallops easier, and usually two good sized leaves will do the trick for each scallop it they are large. One slice of pancetta per scallop is what will be needed to wrap the largest of scallops.
Simply wrap two sage leaves around the edge of each scallop followed by one piece of pancetta. The pancetta will have to be unrolled before being wrapped around the scallops. Once each scallop is wrapped with the sage and pancetta, hold it in place with a toothpick or slide it onto a wooden skewer. I have put 3 scallops on each skewer.
2. Drizzle the wrapped scallops with a little extra virgin olive oil and sprinkle with freshly milled pepper. Set aside until ready to grill or pan sear and allow to come to room temperature.
3. To pan sear, heat a medium-sized frying pan on high heat until very hot. Preheat oven to 450 degrees. Place scallops gently into pan and allow to brown lightly. Flip over and place into hot oven for 5 minutes to finish cooking.
4. Remove scallops from oven and season with fresh lemon juice and salt. Serve immediately.
Sundried Tomato Beurre Blanc
1. Prepare beurre blanc as laid out in my previous beurre blanc recipe, however, for this dish I have added the seeds and inner flesh of tomatoes and some coarsely chopped fresh fennel that was used in my vegetable julienne. The insides of the roma tomatoes is waste as the tomatoes are prepared as in the photo above for julienne. Also, I added finely chopped sundried tomato into the strained reduction. Lastly, don't add the dill as laid out in the recipe link.
Here is the link: http://livingstoncooks.blogspot.com/2007/10/basic-beurre-blanc.html
I have served the scallops with julienne of fennel, zucchini, leek, carrot and tomato.
Wednesday, December 19, 2007
LIVER & ONIONS ANYONE?
Liver is something you either love or hate. Personally...I really enjoy liver about twice a year or so. I like to saute mushrooms with onions and sage and serve them over top of fresh calve's liver that has been dredged in seasoned flour and pan-fried - no more than medium - in melted butter. In my humble opinion it's a meal fit for a king, and if you're the sort to drown it in ketchup then it's off to the gallows with you. Well...maybe just to the local greasy spoon!!
I can sympathize with the ketchup wielding faction however, because my mother - as wonderful a cook as she was - was not adept at cooking liver. She could muster up a really great fry-up...don't get me wrong, and she was a really amazing cook too! But liver wasn't her forte, and because of that one fact, I grew up detesting it. In fact, it wasn't until I went to chef school that I learned to appreciate liver.
I remember sitting through a class on "breakfast cookery" at George Brown College when the instructor brought out the liver. She didn't just bring out the liver...she brought out the liver! The whole liver that is!! She then proceeded to clean and prepare the liver and sliced several pieces in preparation for the class. It was an interesting introduction.
I watched her clean, flour and pan-fry the liver in minutes and she plated it and invited us to sample the finished product. I was unimpressed by the whole thing because technically it was very simple, but when I tasted the liver I loved it! The reason the liver was so good was because it wasn't overcooked.
Now, as I already mentioned, my mother was a great cook. But the reason her liver wasn't quite at the top of my favorite list growing up as a child is because she always cooked it well done. It tasted fine...but as with all well done liver, the flavor got stronger and the texture became "pasty" because it was overcooked. Sorry mom...no gold star!
So, the secret in cooking liver is to cook it medium. As for soaking it in milk to soften the flavor...I've never done it and I don't believe it's necessary. Just don't cook the hell out of it!
One recipe I have for liver is one I was given by another instructor at George Brown. One of the pastry instructors verbally walked me through his favorite way to cook liver and once I tried it myself I loved it. It's my favorite way to prepare liver, although I still like the traditional liver and onions now and then. This is a simple liver pasta dish with a white wine cream sauce. It's as easy to make as, say, Alfredo, with a few additions.
Ingredients:
Calves or beef liver - sliced into 1/2 inch slices
Crimini Mushrooms - sliced
White onion - julienne
Garlic - minced
Butter
White wine
Whipping Cream
Parsley - picked and chopped fine
Linguine - cooked
Salt and pepper
Method:
There are no measurements on this one. If you are preparing this dish for two, get yourself 200 to 300 grams of liver, as many mushrooms as you will like and 1/2 litre of cream will do for the sauce. A dry, crisp white wine will work well for the sauce as well, so try a chardonnay or a pinot gris.
1. In a hot pan, melt two or three pats of butter. Dredge the liver slices in flour and shake off excess. Place liver into the hot pan and brown evenly. DO NOT COOK LIVER THOROUGHLY! Remove liver from pan to rest.
2. Add more butter to hot pan and saute mushrooms until slightly browned. Add julienne onion and minced garlic and cook until soft.
3. Add about 1/2 cup of white wine to the pan and deglaze the pan with a wooden spoon. Bring to a simmer. Add whipping cream. Allow the sause to reduce to the consistency of a cream sauce.
4. Season the sauce with salt and pepper and add the liver back into the sauce to reheat. Heat the liver in the simmering sauce thoroughly and add chopped parsley.
5. Add cooked linguine to the sauce and heat through while tossing.
6. Serve immediately with cold, crisp white wine and a nice salad.
The important things to remember on with this recipe is not to over cook the liver. I can't stress that enough! And when cooking liver and onions...the same rule applies.
Happy Cooking!!
Subscribe to:
Posts (Atom)